RMU build Gen-1.5: IV. Best Practices - F. Enable GUI Access to OPNsense devices
From Internet Computer Wiki
This page is part of the Gen-1.5 RMU build runbook.
Go back to the previous section: E. Enable Remote Access to Servers Console
F. Enable GUI Access to OPNsense devices (Recommended)
This process will guide you through adding access to the OPNsense GUI for device management over Teleport.
Add Teleport Entries For GUI access to OPNsense firewalls
- Edit the
/etc/teleport.yamlfile on the RMU and add the following:- name: <dc>-fw01 uri: https://[<IPv6_of_1st_OPNsense_device>]:443 public_addr: "<dc>-fw01.teleport.<dc>.<domain>" insecure_skip_verify: true rewrite: redirect: - "[<IPv6_of_1st_OPNSense_device>]" - "<dc>-fw01.teleport.<dc>.<domain>" labels: dc: "<dc>" - name: <dc>-fw02 uri: https://[<IPv6_of_2nd_OPNSense_device>]:443 public_addr: "<dc>-fw02.teleport.<dc>.<domain>" insecure_skip_verify: true rewrite: redirect: - "[<IPv6_of_2nd_OPNsense_device>]" - "<dc>-fw02.teleport.<dc>.<domain>" labels: dc: "<dc>"
- Reload the teleport server:
sudo systemctl reload teleport - Now, the GUI access should be visible inside the teleport
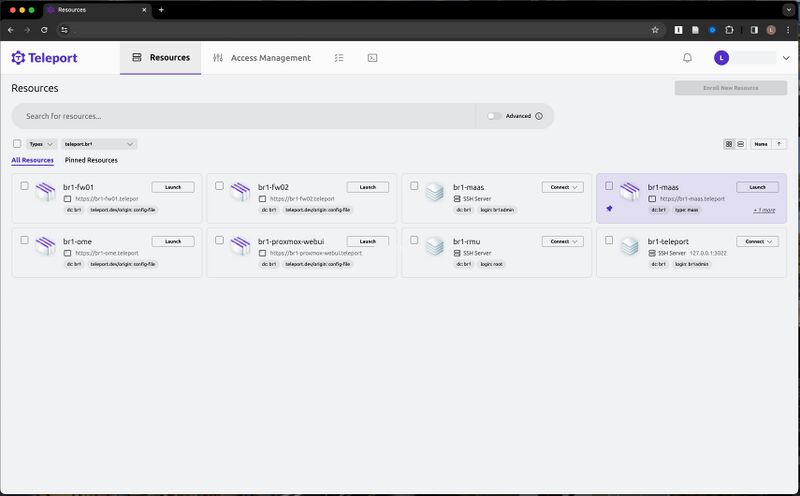
- And the OPNsense login page


