Difference between revisions of "RMU build Gen-1.5: IV. Best Practices - C. Dell OpenManage Enterprise"
From Internet Computer Wiki
Katie.peters (talk | contribs) |
Katie.peters (talk | contribs) |
||
| Line 21: | Line 21: | ||
#*[[File:OME - VM Create - 06 - Memory.png|800px]] | #*[[File:OME - VM Create - 06 - Memory.png|800px]] | ||
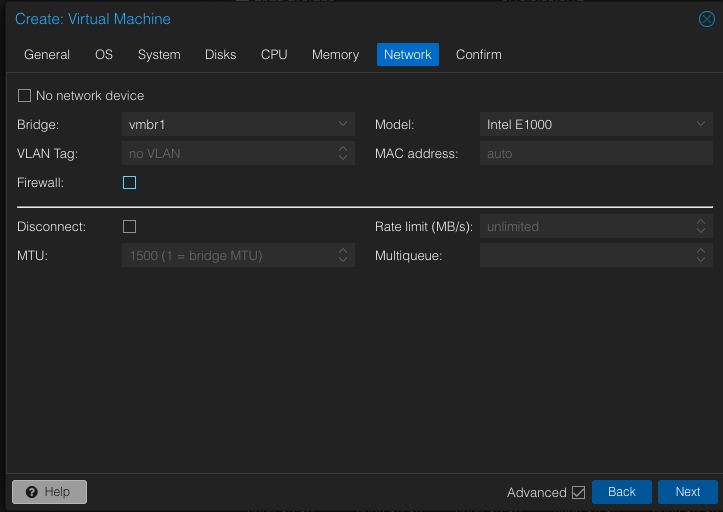
# Set Bridge: to <code>vmbr1</code>, set Mode: to <code>Intel E1000</code>, Disable the <code>Firewall:</code> tickbox. Select <code>Next</code>. | # Set Bridge: to <code>vmbr1</code>, set Mode: to <code>Intel E1000</code>, Disable the <code>Firewall:</code> tickbox. Select <code>Next</code>. | ||
| − | #*[[File:OME - VM Create - 07 - Network.png|800px]] | + | #*[[File:OME - VM Create - 07 - Network.png|800px|link=Special:FilePath/OME_-_VM_Create_-_07_-_Network.png]] |
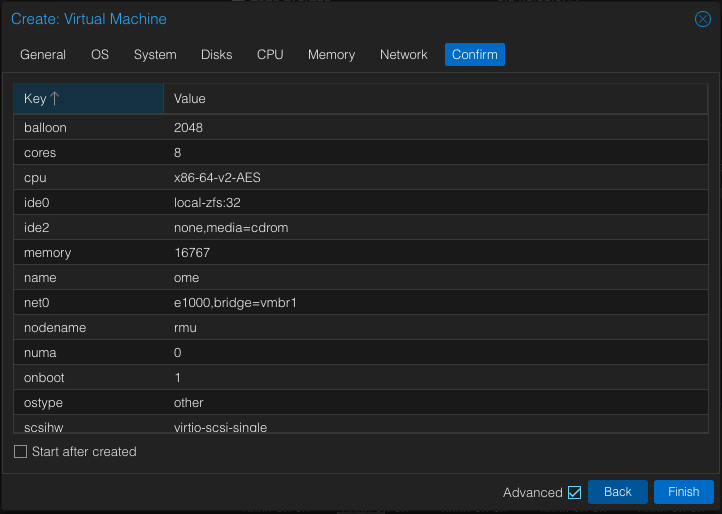
# Do NOT tick the <code>Start after created</code> because we need to map the (soon to be downloaded) OME image to a disk. Select <code>Finish</code>. | # Do NOT tick the <code>Start after created</code> because we need to map the (soon to be downloaded) OME image to a disk. Select <code>Finish</code>. | ||
| − | #*[[File:OME - VM Create - 08 - Confirm.png|800px]] | + | #*[[File:OME - VM Create - 08 - Confirm.png|800px|link=Special:FilePath/OME_-_VM_Create_-_08_-_Confirm.png]] |
| − | |||
| − | |||
| − | |||
==Continue to next section: [[RMU build Gen-1.5: IV. Best Practices - D. Update Firmware on SuperMicro Nodes|D. Update Firmware on SuperMicro Nodes]]== | ==Continue to next section: [[RMU build Gen-1.5: IV. Best Practices - D. Update Firmware on SuperMicro Nodes|D. Update Firmware on SuperMicro Nodes]]== | ||
Revision as of 22:07, 28 February 2024
This page is part of the Gen-1.5 RMU build runbook.
Go back to the previous section: B. Install RACADM Tool on RMU
C. Dell OpenManage Enterprise (Recommended)
This is a service that allows you to talk to the Baseboard Management Controller(s) (BMC) of your IC nodes. This service will allow you to discover your Dell’s servers iDRACs (Dell’s version of a BMC.) Once configured, you will be able to apply firmware updates remotely.
Create VM
- From the main Proxmox page, select
Create VMto launch theCreate: Virtual Machinedialog window. - Tick the
Advancedbox and theStart at boot:box, then enter VM ID of123, set Name: to<dc>-ome. Enter 10 into theStart/Shutdown Order:. SelectNext. - Select
Do not use any media. Set Type: toOther. SelectNext. - Ensure that Graphic card: is set to
Default, SCSI Controller: is set toVirtIO SCSI single, Machine: is set toDefault (i440fx), BIOS: is set toDefault (SeaBIOS). SelectNext. - Ensure that Bus/Device: is set to
IDE&0, Storage: is set tolocal-zfs,Disk size (GiB): is set to8,Backup:box is ticked, Async IO: is set toDefault (io_uring). SelectNext. - Set Sockets to
1, set Type: toX86-64-v2-AES, set Cores: to8. SelectNext. - Set Memory(MiB): to
16767and Minimum memory (MB): to2048. SelectNext. - Set Bridge: to
vmbr1, set Mode: toIntel E1000, Disable theFirewall:tickbox. SelectNext. - Do NOT tick the
Start after createdbecause we need to map the (soon to be downloaded) OME image to a disk. SelectFinish.


Continue to next section: D. Update Firmware on SuperMicro Nodes
Or skip and jump to E. Enable Remote Access to Servers Console
Go to the index of the Gen-1.5 RMU build runbook.